Monday, November 26, 2012

Super Sides: Pinterest Potatoes

I love Pinterest. No surprise there, right? It's a given - kind of like saying I love coffee. I need coffee. I can't live if I don't have my daily dose of morning caffeine. Okay, back on track.

While browsing the food and drink section of Pinterest, I came across a recipe to oven roasted potatoes. It sounded good. Really good. Like, as soon as I read it I wanted to reach through my computer screen with a fork good. The recipe was given rave reviews by other pinners as well. Now, Pinterest can be a fickle place. You might try something and end up with amazing results, or you might try something and wonder how anyone in their right mind thought that was a good idea to even do in the first place, let alone share with millions of people. But this...this recipe I was trying.

The recipe was already adapted from the original, and I adapted it a bit more to my liking and needs as well. Since you can follow the link to the original source, I'm posting the recipe as adapted by me.

What you need:
Olive oil
Yukon gold potatoes
Garlic (minced)
Parsley (or other seasonings)
Salt
Grated Parmesan or Romano cheese

What you do:
Scrub your potatoes and place in a pot with enough water to cover them. Boil the potatoes until tender when pierced with a fork or sharp knife. I left the skin on my potatoes. Once tender, remove the potatoes from the water and let them cool. After they have cooled, slice into chunks.

In a medium sized bowl, pour one to two tablespoons of olive oil, a desired amount of minced garlic (I cheat and scoop a spoonful of pre-minced garlic from a jar), and a dash of salt. Add the potato chunks and mix with your hands until the potatoes are fully coated in olive oil and minced garlic.

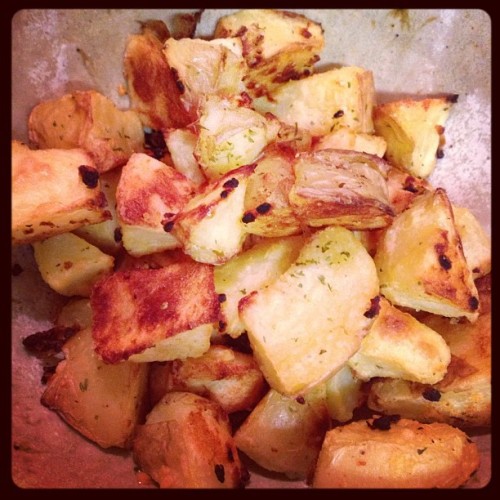
Spray a baking sheet with olive oil and spread the potato chunks on the baking sheet. Then sprinkle with dried parsley and the grated cheese. Put in a pre-heated 425-degree oven and bake for 30-40 minutes. Halfway through cooking time, turn the potatoes so that all sides get cooked to a golden brown.


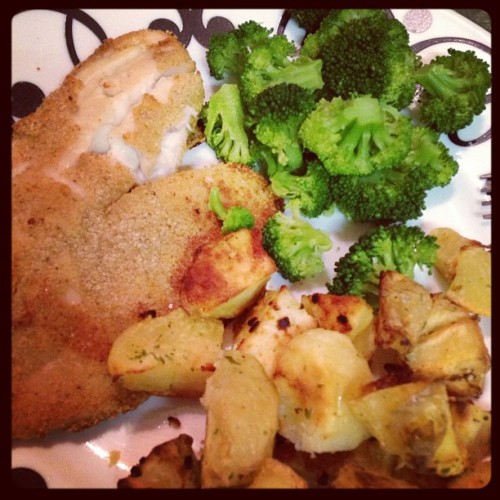
The potatoes came out great - they were even boyfriend approved, and he usually prefers twice baked potatoes. Tonight they were a side to parmesan breaded tilapia and broccoli...perfect! These potatoes will definitely be making an appearance at the dinner table again, maybe next time with bacon like in the original recipe.


Tuesday, November 20, 2012

Super Sides: Mexican Rice

Forget Taco Tuesday. I am down for Mexican night any night of the week. Given my love of that South of the Border flavor, you are almost always guaranteed to find salsa in my fridge and taco seasoning in my spice cabinet. There is also always a healthy supply of Basmati rice, too. Put the three together and you get a Super Side: Mexican Rice. I found this recipe on Pinterest, originally from The Tidy Nest.

This recipe is incredibly easy and requires ingredients that, like me, you probably already have in your fridge or cabinets.

What you need:
1 cup uncooked rice
2 cups chicken broth (or water with bouillon added)
1 tablespoon butter or cooking oil
1/2 cup salsa
1 teaspoon powdered garlic
1 teaspoon taco seasoning


What you do:
Toast the dry rice in the pot on low heat for about 4 minutes before adding any ingredients - this opens the pores of the rice grains and allows it to become fluffy when cooked.

After you've toasted the rice, add all of the remaining ingredients. Bring to a boil for 1 minute, then turn heat to low, put a lid on the pot and let cook until all of the liquid is absorbed and the rice is fully cooked.

So easy, right? I used mild salsa and taco season and admittedly, the flavor of the rice was a little lacking. To give it a boost, I added a few splashes of Tapatío hot sauce. To me, this sauce has a lot of heat, so a splash or two goes a long way.


Monday, November 5, 2012

Miniature Pumpkin Pies

The weekend before Halloween, I hosted a pumpkin carving party at my apartment. With Hurricane Sandy blowing her way toward the Northeast, we opted to move the party indoors instead of enjoy the crisp fall air and colorful leaves outdoors. I have to admit I'm a little disappointed that Mother Nature created the most beautiful party decorations and we were unable to take advantage. Maybe next year. Inside though, with all of our guests, we were comfy and warm and filling our bellies with some of the best autumn foods before setting to work carving our pumpkins.

The menu included: turkey chili, corn bread (made by a guest), garlic hummus with veggies, chips and salsa, pumpkin chocolate chip cookies, spring rolls (made by a guest), caramel covered apple bites, home-brewed pumpkin beer and my favorite: miniature pumpkin pies with freshly whipped heavy cream.

When it comes to pumpkin pie or pumpkin roll, I always turn to Libby's for a guaranteed good recipe. The pumpkin pie recipe is posted online as follows:

3/4 cup granulated sugar
1 tsp ground cinnamon
1/2 tsp salt
1/2 tsp ground ginger
1/4 tsp ground cloves
2 large eggs
1 can (15 oz) pumpkin puree
1 can (12 oz) evaporated milk

The directions are incredibly simple, and Libby's rates the recipe level as "easy:"

In a small bow, mix sugar, cinnamon, salt, ginger and cloves. In a separate, large bowl, beat the eggs. Stir the pumpkin and the sugar-spice mixture into the large bowl. Slowly stir in the evaporated milk.

Easy? They weren't kidding.

All that's left to do is pour the pie filling mixture into the pie shell and bake. The recipe recommends a 9-inch unbaked pie shell with a 4-cup volume, but I was making an easy-to-eat dessert for a party with 9 adult guests and a 4-year-old. To accomplish that, I found Keebler's miniature graham cracker pie crusts. Not traditional for pumpkin pie, but everyone loved the graham cracker crust. I made a dozen miniature pies, and had extra pie filling left.

Baking instructions are to preheat the oven to 425 for 15 minutes, then reduce the heat to 350. Bake the pie for 40-50 minutes and cool on a wire rack for 2 hours.

Given that my party preparation time for making the food was a little tight, I skipped the preheat time and baked the pies at 400 until they were done. They came out juuuust fine. Also, instead of the individual measurements of separate spices, I added 2 tsp of pumpkin pie spice.

To make freshly whipped cream, I put a metal bowl and the beaters for an electric hand mixer in the freezer for about 15 minutes. I'm sure there's a kitchen-science reason for this, but I do it for the reason a lot of us probably do many things in the kitchen: "because that's how mom always did it." When the bowl and beaters are cold, pour heavy cream into the bowl and beat on high until it turns from liquid into a firm but fluffy consistency - whipped cream!  

I really loved having the mini pies as opposed to one large pie. They were the perfect serving size for one person, were in their own foil pie tins so no need for an extra plate, and they make sending leftovers home with guests easy as...pie!