Saturday, June 22, 2013

delicious desserts: busy day chocolate cake with strawberries and cream

I have to admit something. This is the first time ever that I've made a busy day chocolate cake. In fact, it wasn't until I began Pinteresting (it's a verb now...just go with it) my little heart out that I first even heard of busy day chocolate cake when I stumbled upon this adaptation of the Martha Stewart recipe. Let me take a moment here to go off on a little tangent. I love Pinterest. I love the inspirational spark of motivation Pinterest can light. But man, all I ever want to do is bake deliciously terrible-for-your-jeans desserts. Sigh. But anyway, I had a good reason this time, because it was Ashley's birthday!

To make this cake into a real birthday treat, I decided to double the fun and make a two layer cake. I'm usually pretty terrible at two layer cakes. Why? Because I'm too impatient. Sigh again. No matter how long I wait to add frosting and stack the top layer of cake upon the bottom, it never seems like it was enough time. The frosting gets soft from the heat of the cakes and just melts away. It's really quite a tragedy. So this time I smartened up and made this a two-day process. Night 1: bake the cakes. They can cool overnight and into the next day. Night 2: zip home from work, whip up the frosting, slice up the strawberries and assemble the layers. The finished masterpiece: a two layer chocolate cake with cream cheese/Cool Whip frosting and fresh strawberries.

This cake is super simple to make, so here's how you do it:

what you need (makes 1 cake):

1-1/2 cups flour
1 cup sugar
1/4 cup unsweetened cocoa powder
1 tsp baking soda
1/2 tsp coarse salt
6 tbsp vegetable oil
1 tsp vanilla extract
1 tbsp distilled white vinegar
1 cup cold water

what you do:
1. In a large bowl, whisk together the flour, sugar, cocoa powder, baking soda and coarse salt.
2. Make a well in the center of the dry ingredient mixture. Add the vegetable oil, vanilla, vinegar and water.
3. Stir together until all ingredients are well mixed and there are not any lumps in the batter (the consistency is much like brownie mix).
4. Pour into a round cake pan (mine is non-stick so I did not grease it) and bake at 350 for 35-40 minutes. Poke the center of the cake with a toothpick to be sure it's baked all the way through.
5. Remove cake from the oven and cool it in the pan on a wire rack. Once cooled, tip the pan upside down on a serving dish to gently remove the cake. Frost when completely cooled.

Apparently the idea of the "busy day cake" is that you can mix all of the ingredients right in the cake pan. I tried it, and then I poured the dry ingredient mixture into a large mixing bowl which I used to continue adding and mixing the ingredients. There was no was I was going to mix all of the ingredients in my cake pan without half of the batter ending up on the counter. On the plus side: since this recipe doesn't include eggs, if you use a mixing bowl, you get to lick it clean. Kidding, kidding (yeah...not kidding at all).

This frosting is also a quick and delicious option:

what you need:
8 oz package of cream cheese, softened
16 oz container of Cool Whip (let thaw slightly)
1/2 cup (or less) powdered sugar
1/2 tsp vanilla extract

what you do:
1. Combine all 4 ingredients and whip together with an electric mixer until you have a fluffy frosting.
2. Apply to cooled cake or cupcakes (you can use this frosting in a pastry bag or frost your baked treats with a knife).


To make the completed double-decker cake, I made two separate recipes of the cake batter instead of doubling the recipe. Made one, poured it in the cake pan, then made the second and poured it in another cake pan (and then "cleaned" the bowl). The day after baking the cakes, I turned one cake upside down onto a serving dish. I applied a layer of room temperature frosting (easier to work with), spread it over the cake with the back of a large spoon, and on top of it, a layer of strawberry slices. Next I added the second cake, upside down, on top of the strawberries (enough frosting squeezes through between the strawberry slices to keep the cakes together), another layer of frosting, and a final layer of strawberry slices. I decided a little design of the "edge" pieces of strawberries was prettier than completely covering the top of the cake with slices. The sides of the cake are not frosted, but you could frost them if you choose.

The cake was so good - the cream cheese, the chocolate, the strawberries - perhaps one of the best birthday cakes yet!


Tuesday, June 18, 2013

life lesson: budget it!

Back at the beginning of the year, I set a goal for myself and how much money I wanted to save by the end of the year. Not so much a New Year's Resolution, as I've always made an effort to save money, but more a hard and fast goal that I'd work my hardest to achieve.

I'm sure in one way or another, we've all felt the squeeze of our changing economy, whether it's seeing an increase in prices at the grocery store, higher prices at the gas pump, or simply a decrease in extra spending money. I've tried budgeting in the past, but it wasn't something I was ever able to keep up with. I tried apps I downloaded for my iPhone, followed tips I found online, and even made charts on my computer. But the best way I've found to keep track of my spending and see my progress toward my goal? Good old fashioned paper and pencil.

Before sitting down to plan your budget, there are two categories of spending you should consider: static expenses and variable expenses. Your static expenses are those that are same, whether month to month, or year to year. You may have static expenses such as rent or a mortgage, insurance (auto, home or health), a gym membership, your annual car registration or AAA membership, etc. that are the exact same amount every time they're due. Variable expenses are those that will change maybe daily, weekly or monthly. Utilities are often a variable expense, since the amount of the bill depends on your usage, but groceries and spending money are also variable expenses because you likely won't be spending the exact same amount every month.

Since static and variable expenses are incurred differently, I tend to track them in different ways, too. I've made a budget worksheet with sections for my once a year expenses, once a month expenses, and those expenses that I may even incur daily. After my once a year expenses have been paid, I simply record the month paid on successive monthly budget worksheets. For static monthly expenses (rent, Netflix, my gym membership, etc.), I record the date the payment was made. For all other expenses, I record both the date and the amount paid. For categories like spending money or groceries, this is really helpful since I may spend money from this category every few days.

Finally, at the bottom of my budget worksheet is a section to track my monthly income.

At the end of every month, I total each section of my budget and compare it to the amount I budgeted. If all goes well and there aren't any surprise expenses, I come in under budget. If I'm over in one category but under in another, it's good to total all real expenses versus all budgeted expenses to find out if, overall, I'm still under budget. Give yourself some flexibility the first month or two of using a new budget in order to figure out just how much is the right amount for you or your household for each budget category. Don't get frustrated if you're not on or under budget after the first month. With a little trial and error and adjusting your budgeted amount for various categories of your budget, you'll get there. But don't take this as an excuse to allow yourself an absurd amount of spending money while trying to get by on as little money as possible in another category.  

The goal at the end of every month is to be able to transfer as much money as possible into savings at the end of every month, or whatever time may be convenient for your budget. I include an un-budgeted category for my savings account on my budget worksheet so that I can keep track of how often and how much money I transfer into savings. Maybe you have a "big ticket" item and you're trying to save enough money to pay for that item in cash rather than credit. Perhaps you're saving for the down payment on a car or house, saving up for a vacation or just trying to reach a goal to begin investing your money. Whatever your end result, budgeting is a sure way to hold yourself responsible and see your progress as you reach your goal.

Don't forget to keep yourself organized and track your expenses every day. I like to keep my budget worksheets in a binder at home. At the end of every day, I go through my receipts, mental notes or notes in my phone, and transfer the day's expenses onto the budget worksheet. The key really is to not let yourself get behind. Spare 5 or 10 minutes at night to update your budget worksheet. One of the benefits of this budget plan is that you don't have to organize multiple envelopes of cash just to keep yourself on track. You can still use a debit card for your spending - just write everything down.

Feel free to take advantage of my sample budget worksheet, found here. Note: This file will open as a Google Document. If you choose, you can download it as a Microsoft Word document so that you are able to change the budget categories and amounts to make them applicable to your or your household's monthly budget.

Sunday, June 16, 2013

super sides: sweet potato chips

Sweet potato fries and chips seem to be a big hit now that various "caveman" diets have become so popular (think Paleo and Whole30). While still craving the favorite side to grass-fed beef or free-range turkey burger, dieters are opting for sweet potato over the traditional white potato for fries and chips.

But why? Livestrong.com authors did a little research for a comparison between white and sweet potatoes. While the amount of calories, carbohydrates, fiber, protein and fat were fairly close between the 100 g servings of each potato, the sweet potato was the clear winner when it came to vitamins. The amount of Vitamin C and Vitamin A per serving (compared to a white potato) are a likely reason the sweet potato prevails as the healthier choice. However, the white potato can offer a slightly higher amount of iron and potassium.

Nutritional information aside, the way you prepare your food also has a hand in how healthy it is when you eat it. Common sense tells you that fresh veggies are great, but if you load them up with a fatty dressing or lots of melted butter, you're adding calories and perhaps some ingredients you could better live without.

This week, I planned on a dinner of turkey burgers and sweet potato chips. I read countless recipes online, each with loads of comments from readers and at-home chefs who tried and maybe tweaked the recipes, sharing their results. The bottom line? Everyone had an opinion as to how to make the best and crispiest sweet potato treat.

Make your raw sweet potato slices as thin as possible.
I began by following a set of instructions for baking the sweet potato chips. Why baking? Less oil, less mess and less effort.

what you need:
sweet potatoes
mandolin or a sharp knife and steady hand
olive oil
sea salt or other seasonings of your choice

what you do:
1. Wash your sweet potatoes, peel if desired (I chose not to) and slice as thin as possible.
2. Put the sweet potato slices in a large bowl and drizzle with olive oil, mixing the potato slices with your hands to ensure they all get a light coating of oil.
3. Lay the slices out on a baking sheet (I chose a broiler pan with holes that rests on top of a deeper pan) and sprinkle with sea salt or other seasonings (I used Old Bay).
4. Place the pan on the lower rack of a 400º oven and bake for 20-30 minutes, turning the potato slices over halfway through baking time.

Now, here's where I went wrong. Some recipes and comments suggested turning up the heat partway through the baking process, so I upped the temperature to nearly 450º. After throwing in a load of laundry, I came back to the kitchen to find half of the chips crispy and edible, the rest charred. Perhaps if I baked the sweet potato slices longer and at the lower temperature, they all would have turned out great. The edible ones were pretty fantastic though.

Luckily I had three sweet potatoes, so I tried another method - a combination of oil frying and baking.

what you need:
sweet potatoes
mandolin or a sharp knife and a steady hand
cooking oil
sea salt or other seasonings of your choice

what you do:
1. What your sweet potatoes, peel if desired (again, I did not) and slice as thin as possible.
2. Cover the bottom of a large frying pan with cooking oil (1/4-1/2 inch) and turn the burner on medium heat to begin warming the oil.
3. Using a spatula or large spoon, carefully place sweet potato slices in the frying pan. After a couple of minutes, flip the slices over. Continue frying in the oil until you see the slices shrivel and begin resembling a potato chip.
4. Before the chips get too brown, use the spatula to remove them from the oil, allowing excess oil to drain back into the frying pan. Spread the chips out on a baking sheet and sprinkle with sea salt or other seasonings.
5. Once all sweet potato slices have been fried and are on the baking sheet, place the sheet in the oven at 400º. After about 3-5 minutes, check and flip the chips on the cookie sheet. Salt or season the flipped side of the chips and bake for another 3-5 minutes.
6. When you remove the chips from the oven, place them on a paper towel to absorb excess oil before serving.

Although more labor intensive, the second method produced much better chips. They were crispy (except the ones I got a little impatient with while frying), crunchy and a perfect side to homemade turkey burgers. These were definitely worth the effort to make again.

Friday, June 14, 2013

a sign of the season

It's true, summer hasn't official begun, but it's been a beautiful pre-summer season so far here in the southeastern Pennsylvania. With only about a week of somewhat unpleasant temperatures and more rain than the ground can drink, the backyard garden has been happy, happy, happy.

Peppers growing from seed.
We started our seeds indoors sometime around late March/early April. These included peppers, tomatoes, herbs, broccoli, corn and a few flowers. While the spring weather was still a bit crisp, we planted our pea, bean, lettuce, cabbage, carrot and swiss chard seeds directly into our freshly tilled and compost-rich garden soil. We also planted potatoes and onions, and the garlic from last year was still growing strong. Once the ground was free from the risk of frost, we planted squash, cucumber, sunflower, marigold and other assorted flower seeds, and transplanted a few strawberry plants. The variety of plants growing in the garden this year is unbelievable. I'm certain it's the best year yet. 

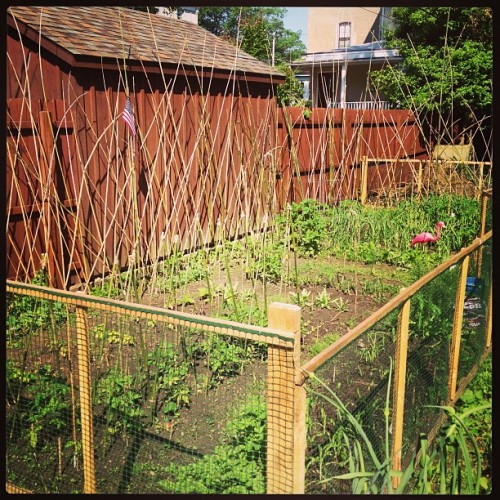
We spent a considerable amount of time constructing a taller, sturdier, and dare I say, more visually appealing garden fence this year. So far it's proven a trusty barrier to most of the critters who venture through the backyard. There's an occasional turf war with one very fat groundhog, but overall we seem to be prevailing.  

Our garden, late spring 2013.
I really can't wait until we start collecting the fruits and veggies the garden will be producing this year. And we have big plans for it all, too. There's always an overabundance of produce to share, and while we look forward to continuing to share the products of a season's work with our friends and neighbors, we also are hopefully to save quite a bit. We've never done any preserving or canning, although we have dried some hot peppers and saved them with a vacuum sealer. This year, Ashley is looking forward to making his own tomato sauce. With all of the basil, oregano, garlic, onions and tomatoes sure to come up, that should be a successful project, even if it's done in small batches. I've found a pretty good resource for preserving garlic and I'm excited to try it. And I also want to make my own mozzarella so I can enjoy 100% homegrown and homemade caprese salad - what a perfect summer treat.

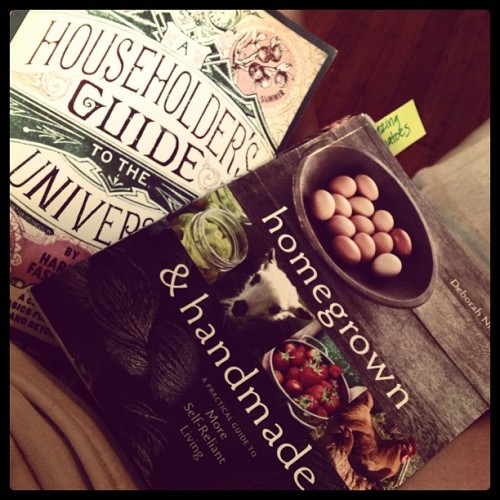
Sunday morning reading.
Recently, I've been really interested in brushing up on my homesteading skills. It's my dream to one day have my own small farm - the ideas are varied and who knows, maybe someday a combination of them will become a reality. I have a number of books I flip through from time-to-time to get some tips, and a whole slew more on my Amazon wishlist. If I can manage to read through even half of them, I think I'll have more knowledge and background information than I'll know what to do with.

And as I've found out over the years, and I'm sure many of you have as well, having big ideas is the easy part. Getting excited about them is pretty effortless, too. It's all the hard work and motivation that goes into making them a reality that's sometimes tough. A little self discipline and diligence will hopefully go a long way, and by the end of the season I hope there are plenty of recipes and tips to share!


Friday, May 3, 2013

VB6: One month later

It's been one month since I decided to try the VB6 lifestyle (if you're totally lost, check my previous post for more details), and I have had "veebeesixcess" for three of those four weeks.

Eating vegetarian or vegan meals isn't totally new to me, as I've had periods of vegetarian eating in the past and I prepare vegan meals from time to time as well. I do find it important to do a week's worth of meal planning in advance, to be sure I have the right foods for breakfast, lunch and daytime snacks. Without advanced planning, my fallback option for lunch tends to be leftovers of the previous night's dinner, but for VB6, that doesn't often work.

So what do I eat for breakfast, lunch and snacks without including any animal products or byproducts? There are still a lot of options! Here are some of my favorite:
  • Mixed greens salad with grilled tofu and vinaigrette dressing (prepare the tofu the night before)
  • Hummus with veggies (cucumber, peppers, cauliflower), pita chips or crackers
  • Banana or apple slices with peanut butter
  • Avocado and banana slices (so good together!)
  • Berries
  • Walnuts
  • Grape tomatoes
  • Orange juice, coconut water and a scoop of Amazing Grass 
  • Naked Juice Green Machine or protein smoothies
  • Odwalla Green Smoothie
  • Channa Masala or Alu Gobi with basmati rice (my co-op sells dishes from a great little Indian take-out restaurant nearby - perfect lunch-sized portions) 
I've noticed that in addition to excluding animal products and byproducts, I'm also excluding a lot of processed foods as a result. Eating mostly whole, unprocessed, and many raw foods is a whole different ballgame and it leaves you feeling much differently. I've lost about 3 pounds and my stomach is a little flatter (oh hey bikini season!) It's taught me a lot, too. Working 10-6, I've been finding myself becoming ravenously hungry around 4:30 p.m. If I haven't packed lunch and snacks well that day, I'm looking at stuffing any and everything in my face when I walk in the door after work - good and bad foods. So the lesson learned: it takes more raw and unprocessed foods to fill me up compared to, say, leftovers of last night's chicken parmesan.

I'm still making my way through reading VB6 and I'm learning quite a bit not only about what to and what not to eat, but about what our food actually is. I've realized when it comes to food, no matter if you've learned something once, a refresher is always good not only to help you make the right choices, but to keep you motivated to make those choices. If you're reading VB6 or have been making the transition to a better way of eating, feel free to share your stories below!      

Wednesday, April 17, 2013

Awesome Appetizers: Caprese "kabobs"

This appetizer really is awesome - 4 edible ingredients plus toothpicks, a recipe as easy as it gets and they are delicious. I found the inspiration here and adapted it slightly for my needs. I was headed to an afternoon birthday party but had to leave home early in the morning with my potluck contribution already prepared. The number of guests was unknown, and I needed something with little clean-up involved since the party would be outside.

What you need:
Fresh mozzarella (one large ball or mini mozzarella balls)
Cherry or grape tomatoes
Fresh basil
Extra virgin olive oil
Toothpicks or cake pop/kabob sticks

What you do:
-Rinse the tomatoes and cut them in half width-wise (to make two half spheres instead of two half ovals)
-Cut the fresh mozzarella into about 1/2 inch squares, or if using mini mozzarella balls, cut in half
-Rinse the fresh basil and pat dry, then cut into small squares (remember a small piece of fresh basil can have lots of flavor)
-Assemble the "kabob" on the toothpick as follows: tomato first, then basil, then mozzarella (if using mini mozzarella balls, assemble so that the half tomato and half mozzarella ball create a complete sphere like a cake pop)
-Lay the finished kabobs on a trap and drizzle or spray with olive oil


After about 30 minutes of prep and assembly time and less than $8 worth of ingredients, I had a tray of around 40-50 Caprese "kabobs." All I had to do when I got to the party was take the lid off the tray. No plates needed for these awesome appetizers - just enjoy and toss your toothpick in the trash or compost bin!

Thursday, April 4, 2013

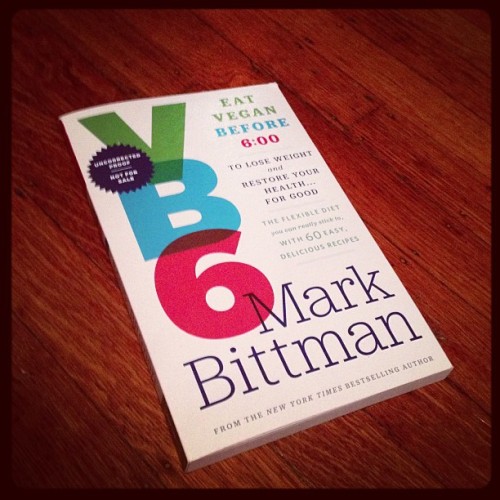
Currently Reading: VB6: Eat Vegan Before 6:00 to Lose Weight and Restore Your Health...For Good

"Currently Reading" is a new feature I'll be adding to Part of the Whole. I love stumbling across a good book - even better for me (and you!) when it's a book packed with information useful to my (and probably your) daily life. So, when I do pick up a book I think would be of interest to readers, I'll be sharing my review. Hunker down folks, this one might take awhile.  


In March, I had the opportunity to attend a Mark Bittman lecture (maybe you've read his food-centric NY Times column or have one of his cookbooks). Just a few days before, Bittman tweeted an offer for his followers to respond via tweet or email for a free, pre-publication copy of his latest book, VB6: Eat Vegan Before 6:00 to Lose Weight and Restore Your Health...For Good (see the Kindle version here). This, his latest book, will be released on April 30, 2013. Perfect timing! The lecture was enjoyable and a good reminder of many topics I'd become familiar with through watching loads of food and farming documentaries and reading other literature on the topics. Bittman introduced the VB6 concept, touching on the conversation with his doctor and the condition of his health that led to his decision to eat a vegan diet before 6 p.m.

Finally, a few weeks later, I'm able to spend some time reading VB6. The concept is simple. I should say that I've done my own informal research on the wide array of specialty "diets" out there (I like how Bittman brings to light the way the use of the word "diet" has become warped so that its general connotation is a short term way of eating for quick results, rather than long-term) - paleo, Whole30, raw, vegetarian, vegan, etc. Obviously, for those of us who are considering changing our (long-term) diet, we are starting at Point A and aiming to settle into the eating habits at Point B. Often, this means saying farewell to certain foods - possibly dairy, gluten, sugar or meat. My educated guess tells me that the initial shock of "I have to give up ____?!" is where some people jump ship before even putting in the effort. Others happily accept the challenge and push on. VB6 seems to be a nice little compromise somewhere between Point A and Point B, wavering throughout the day but generally landing you much closer to Point B than Point A.

Here's the premise of VB6: from the time you wake up until the time you eat dinner, you adopt a vegan diet. You exclude all animal products and byproducts (meat, eggs, butter, cheese, etc.) from your meals and snacks - an extra thumbs up for also restricting your intake of highly processed, nutrient-poor and sugary foods (white bread, pasta, candy...you get the idea). But at dinner time and for any evening snacks, feel free to enjoy those foods you excluded earlier in the day (mainly the animal products and byproducts - it would still be wise to limit or restrict your intake of the highly processed, nutrient-poor and sugary foods). Bittman's reason for the dinnertime allowances makes a lot of sense - this is when we tend to eat out, socialize, have large meals and maybe dessert, a glass of wine or a beer. I'd dare to say that this is when people on a typical diet tend to "slip" - not to say that going from vegan back to your typical eating habits at dinnertime is a built-in "cheat," it just allows for flexibility. And as with just about anything, room for flexibility will likely lead to longevity and success. Also, as Bittman explains in his book, there's no required counting of calories, tallying of points or any other such keep-tracks (unless of course you have some other reason that you want to).

As I was getting ready for bed last night (and I was nowhere near finished with the book by that point), I thought about VB6 and how I should just go ahead and do it. It's really not that hard. Sure I like cheese. I like some chocolate now and then, and a beer on a sunny day. Oh yeah and a good pulled pork sandwich. But will waiting until dinner time to enjoy these foods kill me? I highly doubt it. If anything, it might make me savor and appreciate them a bit more. Luckily, I'd just done a quick grocery shopping trip and was planning on eating vegetarian lunches for the rest of the week, so I was pretty much all set.

So, as I dove into my first attempt at a VB6 day, here's what I ate before dinner:

Breakfast: Grapes, walnuts and black coffee with a little sugar in the raw (the black coffee was a fluke - we were out of half-and-half at work...I wasn't going to budge on the half-and-half and was going to adapt VB6 to "VB6 but after my morning cup o' joe")

Lunch: A honeycrisp apple with extra crunchy peanut butter, Wheat Thins with roasted garlic hummus, more walnuts and water

Guess what? I survived.

On Sunday I run in my first ever 5K - and let me tell you - I am not a runner. That being said, I've learned to enjoy the workouts and the training schedule, and I'd like to sign up for another 5K sometime this summer or fall. I'm looking forward to using VB6 to guide me back to better eating choices as I prepare for round two.

Disclaimers

Always consult your physician before beginning a new diet or fitness plan.

I received my copy of Mark Bittman's VB6: Vegan Before 6:00 to Lose Weight and Restore Your Health...For Good for free from Clarkson Potterson/Publishers through a promotion by Mark Bittman via his Twitter account. Although I did not purchase this book, the review is my uninfluenced opinion and the choice to try the VB6 diet is my own educated decision.