Friday, May 3, 2013

VB6: One month later

It's been one month since I decided to try the VB6 lifestyle (if you're totally lost, check my previous post for more details), and I have had "veebeesixcess" for three of those four weeks.

Eating vegetarian or vegan meals isn't totally new to me, as I've had periods of vegetarian eating in the past and I prepare vegan meals from time to time as well. I do find it important to do a week's worth of meal planning in advance, to be sure I have the right foods for breakfast, lunch and daytime snacks. Without advanced planning, my fallback option for lunch tends to be leftovers of the previous night's dinner, but for VB6, that doesn't often work.

So what do I eat for breakfast, lunch and snacks without including any animal products or byproducts? There are still a lot of options! Here are some of my favorite:
  • Mixed greens salad with grilled tofu and vinaigrette dressing (prepare the tofu the night before)
  • Hummus with veggies (cucumber, peppers, cauliflower), pita chips or crackers
  • Banana or apple slices with peanut butter
  • Avocado and banana slices (so good together!)
  • Berries
  • Walnuts
  • Grape tomatoes
  • Orange juice, coconut water and a scoop of Amazing Grass 
  • Naked Juice Green Machine or protein smoothies
  • Odwalla Green Smoothie
  • Channa Masala or Alu Gobi with basmati rice (my co-op sells dishes from a great little Indian take-out restaurant nearby - perfect lunch-sized portions) 
I've noticed that in addition to excluding animal products and byproducts, I'm also excluding a lot of processed foods as a result. Eating mostly whole, unprocessed, and many raw foods is a whole different ballgame and it leaves you feeling much differently. I've lost about 3 pounds and my stomach is a little flatter (oh hey bikini season!) It's taught me a lot, too. Working 10-6, I've been finding myself becoming ravenously hungry around 4:30 p.m. If I haven't packed lunch and snacks well that day, I'm looking at stuffing any and everything in my face when I walk in the door after work - good and bad foods. So the lesson learned: it takes more raw and unprocessed foods to fill me up compared to, say, leftovers of last night's chicken parmesan.

I'm still making my way through reading VB6 and I'm learning quite a bit not only about what to and what not to eat, but about what our food actually is. I've realized when it comes to food, no matter if you've learned something once, a refresher is always good not only to help you make the right choices, but to keep you motivated to make those choices. If you're reading VB6 or have been making the transition to a better way of eating, feel free to share your stories below!      

Wednesday, April 17, 2013

Awesome Appetizers: Caprese "kabobs"

This appetizer really is awesome - 4 edible ingredients plus toothpicks, a recipe as easy as it gets and they are delicious. I found the inspiration here and adapted it slightly for my needs. I was headed to an afternoon birthday party but had to leave home early in the morning with my potluck contribution already prepared. The number of guests was unknown, and I needed something with little clean-up involved since the party would be outside.

What you need:
Fresh mozzarella (one large ball or mini mozzarella balls)
Cherry or grape tomatoes
Fresh basil
Extra virgin olive oil
Toothpicks or cake pop/kabob sticks

What you do:
-Rinse the tomatoes and cut them in half width-wise (to make two half spheres instead of two half ovals)
-Cut the fresh mozzarella into about 1/2 inch squares, or if using mini mozzarella balls, cut in half
-Rinse the fresh basil and pat dry, then cut into small squares (remember a small piece of fresh basil can have lots of flavor)
-Assemble the "kabob" on the toothpick as follows: tomato first, then basil, then mozzarella (if using mini mozzarella balls, assemble so that the half tomato and half mozzarella ball create a complete sphere like a cake pop)
-Lay the finished kabobs on a trap and drizzle or spray with olive oil


After about 30 minutes of prep and assembly time and less than $8 worth of ingredients, I had a tray of around 40-50 Caprese "kabobs." All I had to do when I got to the party was take the lid off the tray. No plates needed for these awesome appetizers - just enjoy and toss your toothpick in the trash or compost bin!

Thursday, April 4, 2013

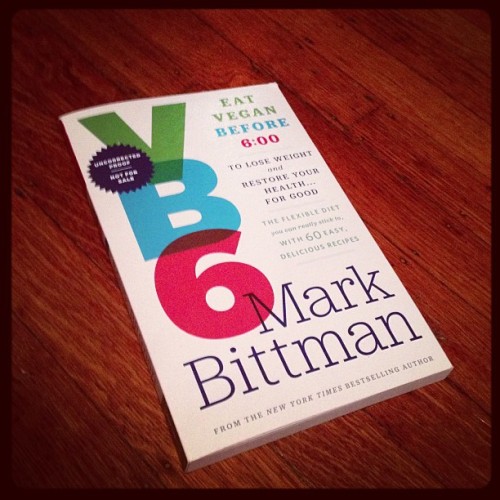
Currently Reading: VB6: Eat Vegan Before 6:00 to Lose Weight and Restore Your Health...For Good

"Currently Reading" is a new feature I'll be adding to Part of the Whole. I love stumbling across a good book - even better for me (and you!) when it's a book packed with information useful to my (and probably your) daily life. So, when I do pick up a book I think would be of interest to readers, I'll be sharing my review. Hunker down folks, this one might take awhile.  


In March, I had the opportunity to attend a Mark Bittman lecture (maybe you've read his food-centric NY Times column or have one of his cookbooks). Just a few days before, Bittman tweeted an offer for his followers to respond via tweet or email for a free, pre-publication copy of his latest book, VB6: Eat Vegan Before 6:00 to Lose Weight and Restore Your Health...For Good (see the Kindle version here). This, his latest book, will be released on April 30, 2013. Perfect timing! The lecture was enjoyable and a good reminder of many topics I'd become familiar with through watching loads of food and farming documentaries and reading other literature on the topics. Bittman introduced the VB6 concept, touching on the conversation with his doctor and the condition of his health that led to his decision to eat a vegan diet before 6 p.m.

Finally, a few weeks later, I'm able to spend some time reading VB6. The concept is simple. I should say that I've done my own informal research on the wide array of specialty "diets" out there (I like how Bittman brings to light the way the use of the word "diet" has become warped so that its general connotation is a short term way of eating for quick results, rather than long-term) - paleo, Whole30, raw, vegetarian, vegan, etc. Obviously, for those of us who are considering changing our (long-term) diet, we are starting at Point A and aiming to settle into the eating habits at Point B. Often, this means saying farewell to certain foods - possibly dairy, gluten, sugar or meat. My educated guess tells me that the initial shock of "I have to give up ____?!" is where some people jump ship before even putting in the effort. Others happily accept the challenge and push on. VB6 seems to be a nice little compromise somewhere between Point A and Point B, wavering throughout the day but generally landing you much closer to Point B than Point A.

Here's the premise of VB6: from the time you wake up until the time you eat dinner, you adopt a vegan diet. You exclude all animal products and byproducts (meat, eggs, butter, cheese, etc.) from your meals and snacks - an extra thumbs up for also restricting your intake of highly processed, nutrient-poor and sugary foods (white bread, pasta, candy...you get the idea). But at dinner time and for any evening snacks, feel free to enjoy those foods you excluded earlier in the day (mainly the animal products and byproducts - it would still be wise to limit or restrict your intake of the highly processed, nutrient-poor and sugary foods). Bittman's reason for the dinnertime allowances makes a lot of sense - this is when we tend to eat out, socialize, have large meals and maybe dessert, a glass of wine or a beer. I'd dare to say that this is when people on a typical diet tend to "slip" - not to say that going from vegan back to your typical eating habits at dinnertime is a built-in "cheat," it just allows for flexibility. And as with just about anything, room for flexibility will likely lead to longevity and success. Also, as Bittman explains in his book, there's no required counting of calories, tallying of points or any other such keep-tracks (unless of course you have some other reason that you want to).

As I was getting ready for bed last night (and I was nowhere near finished with the book by that point), I thought about VB6 and how I should just go ahead and do it. It's really not that hard. Sure I like cheese. I like some chocolate now and then, and a beer on a sunny day. Oh yeah and a good pulled pork sandwich. But will waiting until dinner time to enjoy these foods kill me? I highly doubt it. If anything, it might make me savor and appreciate them a bit more. Luckily, I'd just done a quick grocery shopping trip and was planning on eating vegetarian lunches for the rest of the week, so I was pretty much all set.

So, as I dove into my first attempt at a VB6 day, here's what I ate before dinner:

Breakfast: Grapes, walnuts and black coffee with a little sugar in the raw (the black coffee was a fluke - we were out of half-and-half at work...I wasn't going to budge on the half-and-half and was going to adapt VB6 to "VB6 but after my morning cup o' joe")

Lunch: A honeycrisp apple with extra crunchy peanut butter, Wheat Thins with roasted garlic hummus, more walnuts and water

Guess what? I survived.

On Sunday I run in my first ever 5K - and let me tell you - I am not a runner. That being said, I've learned to enjoy the workouts and the training schedule, and I'd like to sign up for another 5K sometime this summer or fall. I'm looking forward to using VB6 to guide me back to better eating choices as I prepare for round two.

Disclaimers

Always consult your physician before beginning a new diet or fitness plan.

I received my copy of Mark Bittman's VB6: Vegan Before 6:00 to Lose Weight and Restore Your Health...For Good for free from Clarkson Potterson/Publishers through a promotion by Mark Bittman via his Twitter account. Although I did not purchase this book, the review is my uninfluenced opinion and the choice to try the VB6 diet is my own educated decision.   

Sunday, March 10, 2013

Carrot Cake with Vanilla Buttercream Frosting

We've had beautiful spring-like weather this weekend and my KitchenAide Mixer has been sitting dormant far too long. I had an itch to bake something, and no other baked goods says springtime like a carrot cake. For the cake recipe, I turned to my trusty Better Homes & Gardens cookbook (with a couple adjustments), and for the vanilla buttercream frosting, I found a great recipe via Pinterest.

Carrot Cake

What you need:

4 eggs, beaten
2 cups all-purpose flour
2 cups sugar
2 tsp baking powder
1 tsp ground cinnamon
1/8 tsp ground nutmeg
1/8 tsp ground ginger
1/2 tsp salt
1/2 tsp baking soda
3 cup finely shredded carrot (lightly packed)
3/4 cup (or 1-6 oz container) vanilla flavored Greek yogurt*

What you do:

- Allow the eggs to warm to room temperature for 30 minutes. While the eggs were warming, I peeled and shredded carrots in my food processor. Preheat your oven to 350 degrees.

- In the bowl for my KitchenAid, I combined the dry ingredients (flour, sugar, baking powder, cinnamon, nutmeg, ginger, salt and baking soda).

- In a separate bowl, I combine the shredded carrot, yogurt and eggs.

- Add the shredded carrot, yogurt and egg mixture to the dry ingredient mixture and stir together until thoroughly combined.

- Pour into two greased 9-1/2 inch round cake pans (I used an extra long loaf pan from Ikea that was the perfect size for the amount of batter this recipe produces).

- Bake for 30-40 minutes at 350 degrees. Check that the cake has baked through by inserting a toothpick into the cake. If it comes out clean, the cake is done.

- When the cake is done, cool in the pan(s) on a rack for 10 minutes, then turn onto a cooling rack and cool thoroughly before frosting.

*Using yogurt will create a very dense cake. If you prefer a fluffier, lighter cake, use 3/4 cup oil instead of yogurt.

Vanilla Buttercream Frosting

What you need:

1/2 cup egg whites (I used the pre-separate whites from Egg Beaters)
1/2 cup sugar
1/2 lb (8 oz.) unsalted butter (room temperature, but into slices)
1 tsp vanilla extract (or flavor of your choice)

(the original recipe is double these amounts but this amount was perfect for frosting and filling my cake)

What you do:

- Put a pot of water on the stove and let it simmer. Set your metal mixing bowl (I used the bowl from my KitchenAid) over the pot of water (see original post for photos of the process).

- In the mixing bowl, combine the egg whites and sugar. Whisk continually until the sugar dissolves and the mixture reaches a temperature of 140 degrees. As Gail says in her post, the mixture will be warm to the touch.

- With the whisk attachment of your mixture, begin beating the egg and sugar mixture. Increase the mixer speed as the mixture thickens.

- Once the mixture thickens, change to the paddle attachment and add the butter a couple of pieces at a time. If the buttercream is lumpy, increase the speed on your mixer until the buttercream smooths out.

- Add your flavoring extract and mix in thoroughly. Refrigerate the buttercream frosting until your cake is thoroughly cooled and ready to be frosted.

- Add a layer of frosting between the cake layers and then frost the top and sides. Mine doesn't look pretty, but it sure tastes good!


Monday, January 28, 2013

Freshen Up

I love walking in the door to a fresh smelling home. There are lots of products on the market to give your home a signature scent, but not all of them are products you'd want to use once you do a little research and find out just how harmful they have the potential to be. For example, those scented oil warmers and air freshening sprays? No good, my friends. Based on the Natural Resources Defense Council's (NRDC) research and publications, these products contain harmful levels of phthalates, which have been known to cause a number of scary problems, including birth defects, other reproductive issues and hormonal abnormalities. No thanks. Whether it's to get rid of a definite odor, add some freshness to a house that's had the windows shut all winter, or fill the air with a pleasant scent before company comes over, sometimes you just want to smell something good.

While browsing Pinterest, I've come across three safe alternatives that I now use instead of the commercially produced products.

1. Real Scented Oil - If you have a scented oil plug-in with a glass bulb (like the Bath & Body Works type), you have an easy solution. Unscrew the bulb from the plug-in and pull out the rubber stopper containing the wick. Empty and rinse the bulb, then refill with a pure aromatherapy oil (I really like peppermint oil for the fresh, clean scent and I purchase the oil from my local co-op). You can fill the glass bulb completely with oil for a longer lasting scent, or dilute with water. Plug it in and enjoy the healthier, fresh scent. Traditionally, there are oil warmers which are small dishes that are mounted above tea light candles. You pour a little bit of essential oil in the dish, put a tea light candle in the tray below it and the heat from the candle warms the oil and allows it to diffuse throughout the air. Of course, this type of oil warmer can only be used when you are home to keep an eye on the flame.

2. The Williams-Sonoma Scent - I've seen this one a lot on Pinterest, claiming to be that signature scent that makes you swoon whenever you walk by a Williams-Sonoma store in the mall. And whether it is or it isn't, it sure smells good! I actually had a pot of this boiling on the stove this past weekend. I had a lemon in the fridge, a rosemary plant still going strong in the garden, and vanilla in my baking supplies - those three ingredients plus water is all this recipe takes. I sliced half the lemon, cut about 3 sprigs of rosemary and poured in about a tablespoon of vanilla, then filled a medium sauce pan halfway with water. Turn the burner to low and let the mixture simmer and enjoy the relaxing scent it produces. You can probably even do this in a crockpot, too. As the water boils out, add more. Another variation of this that I love is swapping ground cinnamon or a couple of cinnamon sticks for the rosemary. It's an equally pleasant, warm and room-freshening scent.

3. Scented Soy Candles - I found this recipe for soy candles and it is both incredibly easy and not very time consuming. I purchased the soy flakes and wicks from a craft supply store, heated the soy flakes in a ceramic dish in the microwave until melted, stirred in a few drops of pure aromatherapy oil (peppermint again) placed a wick in a mug I picked up from a thrift store, and poured in the melted soy wax. All that's left to do is let the wax harden and you can start burning your homemade scented candle. When you purchase soy candles at the store, you might notice that they're a little more expensive than regular wax candles. I think this is probably because they typically have a longer burn time compared to a similar sized regular wax candle. Soy is a renewable product and it washes right off a ceramic dish with a little hot water and wiping with a soapy sponge. Hint: These make great gifts, too!         

Not all products are created equally, and if you still prefer the ease of picking up a ready-to-use product at the store rather than making your own, there are a few good options listed in the above-linked NRDC publication.

This is not a sponsored  post. All products and brands mentioned were purchased by my choice with my money. 

Saturday, January 26, 2013

"Egg Pie"

So far in 2013, I've been doing fairly well with my weekly meal planning and grocery shopping. Last week's meal plan took a detour though, because when Wednesday night rolled around and I informed Ash I was making frittatas for dinner, he suggested we go out on a date because he didn't want "egg pie" for dinner (you know, because it tastes like eggs). The plan wasn't a total loss, though, because we made frittatas for brunch on Sunday.

What I like most about frittatas are that they're like making a pizza or going through a salad bar: same base, but you can add just about whatever you want so that you never have eat the same combination twice. That's also what makes a frittata great as a last-minute meal idea. As long as you have eggs, I'd be willing to bet you have a few other things in your pantry or fridge that you can chop up and toss in to make your meal.

Here are some of the ingredients I like to add: cheese (any kind), asparagus, broccoli, black beans, potatoes, onions, peppers, scallions, sausage, bacon...the list goes on.

Ash and I, at times, have very different ideas about what "good" food is. He can go for basic meat and potatoes while I like loads of veggies. Sometimes that makes preparing one large dish difficult because it can leave one person unsatisfied with their meal or forceone to eat what they don't like. The solution? Two adorable Fiesta miniature pie plates. Their 6-3/8 inch diameter makes them perfect for individual servings. (We recently purchased really fun dishes from Terrain...they're blue, red and yellow with designs like dancing cows and roosters and pigs. Since then, I've been picking up pieces in coordinating solid colors to fill out the set.).

What You Need:
Olive oil or cooking spray
Eggs
Other ingredients (cheese, potatoes, peppers, sausage, etc.)
Seasonings (salt, pepper, Old Bay, paprika, etc.)

What You Do:
1. Give each pie plate a light spray of olive oil or cooking spray.

2. Crack the desired number of eggs into each dish, and beat (3 for Ash, 2 for me).

3. Wash, chop, peel, etc. all of your extra ingredients and add desired amount to each dish with any seasonings, then mix it all up. When using potatoes, I chop into small pieces and cook in a frying pan with olive oil and Old Bay seasoning until soft before adding them to the beaten eggs.

4. Bake uncovered at 350ยบ for about 25 minutes or until the egg is cooked all the way through (you'll notice the frittata will cook from the edges of the plate toward the middle, so when there is no longer a puddle of egg in the middle, it's done).


Over the years I've developed a sort of love-hate relationship with eggs. Some mornings I can't wait to dig into freshly scrambled eggs with cheese. Other mornings, well, the thought of eggs kind of makes me want to vom a little. I realized after making the frittatas that this was one of those no egg mornings for me...sigh. The dogs were pretty happy about that.

This is not a sponsored  post. All products and brands mentioned were purchased by my choice with my money. 

Friday, January 25, 2013

Shepherd's Pie

In elementary school, my cousin and I were in a Girl Scout troop led by her mom. Every year we'd do a "practice" camping trip or two in their back yard and another one or two "real" camping trips at large Girl Scout camps a state away. One meal that always showed up on the menu was shepherd's pie. It's one of those easy to prepare, one-dish meals that packs in your meat, vegetables and carbs.

Those days being distant memories, I haven't had shepherd's pie in about as many years. It wasn't until I was browsing Pinterest one night and found this recipe that I thought about shepherd's pie as a viable, not-eating-dinner-in-the-woods dinner option. I remember our Girl Scout version having peas and corn in the "pie," so I adapted the recipe a bit for my own tastes, and scaled down the ingredients to make just two servings.

How great are these mini bags of frozen veggies?
What You Need:
-Ground meat (my choice: turkey)
-Olive oil
-Lipton Recipe Secrets - Onion
-Carrots
-Frozen peas
-Frozen corn
-Potatoes (my choice: russet baking potatoes)
-Shredded cheese (my choice: Mexican blend)
-Milk (my choice: skim)
-Butter (my choice: Land 'O Lakes spread with Canola Oil)

What You Do:
1. Begin by washing and then boiling the potatoes in water. I used two smallish (about 3 inch) Russet baking potatoes, since that's all that was available at my grocery store. I left the skin on while boiling.

2. Using my Misto oil mister, I sprayed a large frying pan with extra virgin olive oil and began browning the ground turkey. I used about 1/3 of a 1.3 lb package of turkey.

3. Wash, peel and chop the carrots and add them to the meat.

4. After the meat has browned, add the Lipton Recipe Secrets, frozen corn, frozen peas and water to the frying pan. I used half of one pouch of the Lipton Recipe Secrets and about 1/2 cup of water. Turn up the heat and continue to stir until the water has boiled out. Beware - this is when it starts smelling really good.


5. Once the potatoes are soft enough to pierce with a fork, remove them from the water and mash with milk, butter and cheese. My measurements here aren't exact. Just enough milk to get the consistency of somewhat thick mashed potatoes, less than 1 tbs of butter and about a handful of shredded cheese. Stir together until the cheese melts. I mashed the potatoes with the skin on them.

6. In your serving dish(es) - I opted for those great little 6-3/8 inch Fiesta pie plates again - layer the meat and vegetable mixture, then a layer of mashed potatoes on top.

7. Bake uncovered at 400 degrees for about 15 minutes. The potatoes should be a little golden around the edges.

And now the question - to eat it with a fork or a spoon?

Going, going, gone! This was so good, I wanted to eat both plates!
This is not a sponsored  post. All products and brands mentioned were purchased by my choice with my money.