Friday, December 7, 2012

"Christmas is coming, the goose is getting fat..."

No, there will not be a goose on my table at Christmas. There will, however, be a delicious ham and maybe salmon, too!

I love planning elaborate holiday meals. Spending most of my evenings cooking for one or two, I don't often have the chance to plan and prepare a large meal with one or two main courses, several sides and a couple of dessert options. This is the time of year I love when it comes to cooking.

When it comes to Thanksgiving and Christmas, I like to prepare different meals - what is the fun of preparing two feasts only a month apart if they are going to be exactly the same? You with me on this one?

I found a pin on Pinterest with instructions for cooking the ham in a crock pot, rather than the oven. Thoughts? I do sort of love that crisped edge of the ham when it's been baking in the oven for several hours, but a crock pot would free up precious oven space for other baking needs.    

As the planning begins, here is what I am considering for my Christmas meal this year, which will again be shared with local friends as none of us are traveling:

How about you? What are you planning for the next big holiday meal? Here's to happy holidays and a snowy winter ahead!


Monday, December 3, 2012

I love a simple dinner


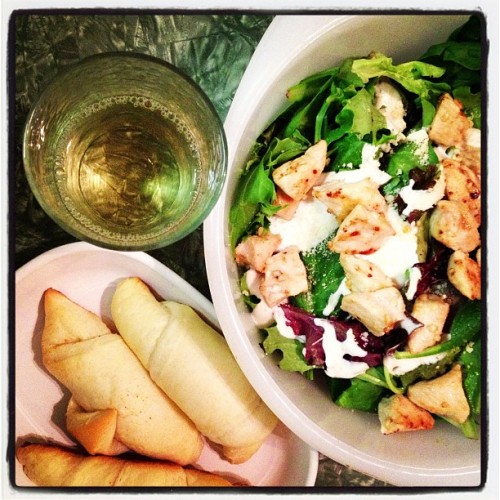
A small glass of white wine, a chicken Caesar salad and garlic butter crescent rolls. Just right.

Saturday, December 1, 2012

Gobble 'til you Wobble

Happy post-Thanksgiving everyone! I hope the first big holiday meal of the season was a delicious success! Settle in guys, because this post is a long one.

I really love Thanksgiving. I've heard some grumbles that it's a lot of effort for what ends up being more or less just a big family dinner - that the holiday isn't as special as some others. No, there are not gifts like at Christmas or Hanukkah. No baskets overflowing with colorful confections like at Easter. It's just family and friends. But you know what? I think that's a gift in itself.

Winter is such a cozy time and there's something so comforting about it to me. Thanksgiving is a warm welcome to this rush of holidays and helps me get settled in for the season that lies ahead.
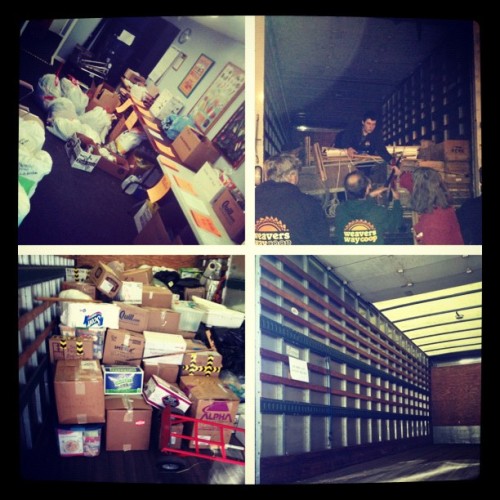
The unofficial launch of the season for me what when I worked with my my co-op to begin a donation drive for Hurricane Sandy victims. We spent a week accepting item donations, packed a truck, and headed to New Jersey the Saturday before Thanksgiving. At the distribution site, we were met by a few other volunteers who amazingly helped unload boxes that filled nearly half of a 20-foot delivery truck and carry the items to the second floor of the building. Everyone one was so incredibly generous and supportive of the cause, and I can't think of a better way to extend thanks and gratitude and friendship.

It seems that many of my friends and I have come to settle in Philadelphia - away from many of our families - for a number of education or employment related reasons. Despite far-away families, we don't let this stop our holiday fun. Enter Orphan Thanksgiving and Orphan Christmas. We throw together a potluck style holiday feast. Who cares if there are multiples of any one type of food - the idea is that everyone brings his or her favorite part of the holiday meal with family.

In the past, there haven't been enough of us for cooking and entire Turkey Day bird, but this year...this was the year. Not only was it our first ever Orphan Thanksgiving turkey, it was my first ever turkey. And I've got to tell you - if I'm going to cook an entire bird, well, I'm doing it the right way, damn it!

I belong to the Weaver's Way Co-op in my neighborhood. Every year before holiday season rolls in, an email for turkey orders is circulated. There are several options of free-range, organic, local and/or kosher turkeys. A friend of mine was telling me the story of how one year, a co-worker who also was the operator of a small turkey farm asked her if she'd like to order her Thanksgiving turkey from him. She decided to try it, and she's never purchased a traditional store-bought turkey since. She also gave me her secret - brine that bird.

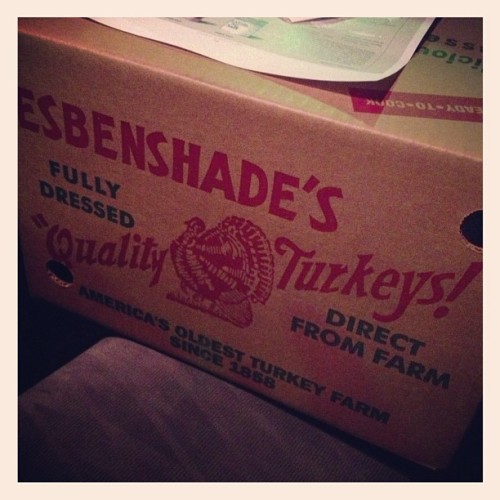
My prized bird was a 10-12 pound turkey from Esbenshade Turkey Farm in Paradise, PA. It was local, farm-raised, reasonably priced and from the oldest turkey farm in our country! This farm has been a source for fresh turkeys since 1858, if you can believe that. I like a company with a good history! I picked it up from a refrigerated truck parked outside the co-op a couple of days before Thanksgiving. On Wednesday afternoon, Ash and I went to NYC to see the Macy's Thanksgiving Day Parade balloons begin to take shape.      

When we finally made our way home from the train station, it was midnight. But, with a turkey needing to be brined, there was no rest for the weary. I picked up a brining instructional sheet from the co-op when I picked up my turkey, and loosely followed the instructions. I'm always a little conservative with salt measurements, so I used far less than was recommended.

Brine:
Brine bag(s)
Bucket or large cooler
Sea Salt
Filtered water
Fresh herbs (thyme)

I prepared the brine by double layering two large oven bags inside a large cooler. The temperature was dipping into the low 30s overnight, so I planned to leave the cooler on the deck behind my apartment overnight. In the bag, I poured several pitchers of filtered water, and about 1/4-1/3 cup of sea salt. I stirred the room temperature water and the salt together until the salt began to dissolve. Then I added a handful of fresh thyme. Finally, I placed the turkey (with the guts removed from the cavity) into the bags. I tied up the inside layer of the bag, and then the outside, closed the lid and put the turkey to bed outside for the night. It was suggested to brine the turkey for about 12 hours, and by the time I took it out of the brine bath in the morning to prep it for roasting, it had been about 10-11 hours.

Thursday morning, I removed the turkey from the brine and placed it on the roasting rack breast-up while I began preparing it.

Turkey Prep:
Olive oil in a misting canister
Garlic (minced, from a jar)
White wine (Pinot Grigio)
Vegetable bouillon (Better Than Bouillon paste)
Fresh herbs (thyme)
Water

The turkey prep was fairly quick and I had it in the oven beginning to roast in about 30 minutes. First, I misted the entire bird with extra virgin olive oil - a healthier option than butter and it would help the skin crisp to perfection. Then I spooned (just a regular cereal spoon) pre-minced garlic from a jar (time saver!) onto the turkey and spread it around. I also put a spoonful in the breast cavity. I love the flavor of fresh thyme with poultry, so even though there was thyme in the brine bath, I placed more fresh time all over the surface of the turkey and several sprigs in the cavity as well. The vegetable bouillon paste adds an excellent flavor to so many foods - I use it in cream of broccoli soup, chicken soup, rice, etc. I put a spoonful in the cavity and also mixed a couple of spoonfuls with 1-1.5 cups of filtered water and poured it in the bottom of the roasting pan. Finally, I poured the white wine into the cavity. As the bird cooked, I added a little more wine about twice. Together, the vegetable broth (made of the paste and water) and the wine created a really nice basting liquid. There was no special insight into the type of wine I used. Really, it was due to a mistake - I prefer to drink sauvignon blanc and picked up the pinot by mistake, so rather let it sit in the fridge forever, I've been using it for cooking.

I made a foil covering for the bird and kept it loosely covering the turkey on the roasting pan for about two-thirds of the roasting time. I removed it for the last 1-1.5 hours of roasting time. The oven temperature was set to 350º and the 10-12 pound bird took about 4 hours to roast, bringing the internal temperature of breast and legs to 175º.

The bird was a total hit - everyone loved the flavor of the meat and the brining absolutely was key - no dry meat!    

Monday, November 26, 2012

Super Sides: Pinterest Potatoes

I love Pinterest. No surprise there, right? It's a given - kind of like saying I love coffee. I need coffee. I can't live if I don't have my daily dose of morning caffeine. Okay, back on track.

While browsing the food and drink section of Pinterest, I came across a recipe to oven roasted potatoes. It sounded good. Really good. Like, as soon as I read it I wanted to reach through my computer screen with a fork good. The recipe was given rave reviews by other pinners as well. Now, Pinterest can be a fickle place. You might try something and end up with amazing results, or you might try something and wonder how anyone in their right mind thought that was a good idea to even do in the first place, let alone share with millions of people. But this...this recipe I was trying.

The recipe was already adapted from the original, and I adapted it a bit more to my liking and needs as well. Since you can follow the link to the original source, I'm posting the recipe as adapted by me.

What you need:
Olive oil
Yukon gold potatoes
Garlic (minced)
Parsley (or other seasonings)
Salt
Grated Parmesan or Romano cheese

What you do:
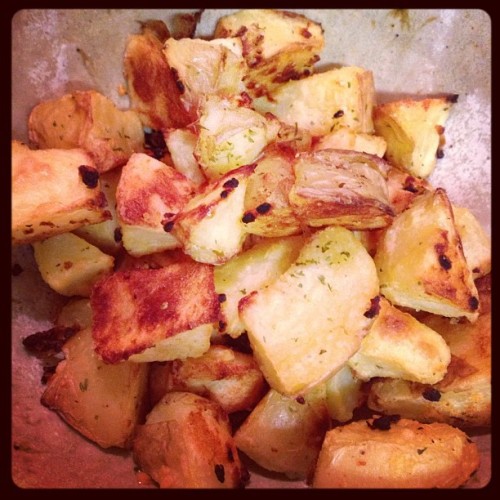
Scrub your potatoes and place in a pot with enough water to cover them. Boil the potatoes until tender when pierced with a fork or sharp knife. I left the skin on my potatoes. Once tender, remove the potatoes from the water and let them cool. After they have cooled, slice into chunks.

In a medium sized bowl, pour one to two tablespoons of olive oil, a desired amount of minced garlic (I cheat and scoop a spoonful of pre-minced garlic from a jar), and a dash of salt. Add the potato chunks and mix with your hands until the potatoes are fully coated in olive oil and minced garlic.

Spray a baking sheet with olive oil and spread the potato chunks on the baking sheet. Then sprinkle with dried parsley and the grated cheese. Put in a pre-heated 425-degree oven and bake for 30-40 minutes. Halfway through cooking time, turn the potatoes so that all sides get cooked to a golden brown.


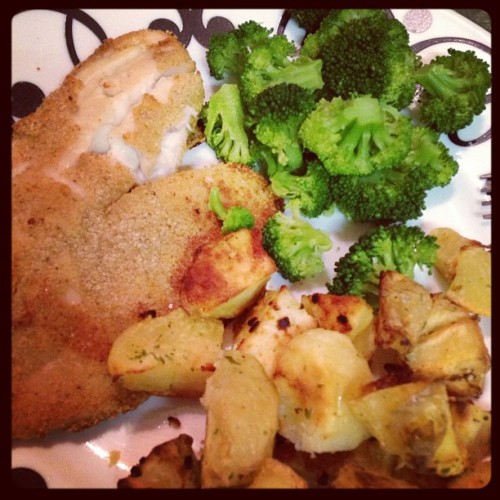
The potatoes came out great - they were even boyfriend approved, and he usually prefers twice baked potatoes. Tonight they were a side to parmesan breaded tilapia and broccoli...perfect! These potatoes will definitely be making an appearance at the dinner table again, maybe next time with bacon like in the original recipe.


Tuesday, November 20, 2012

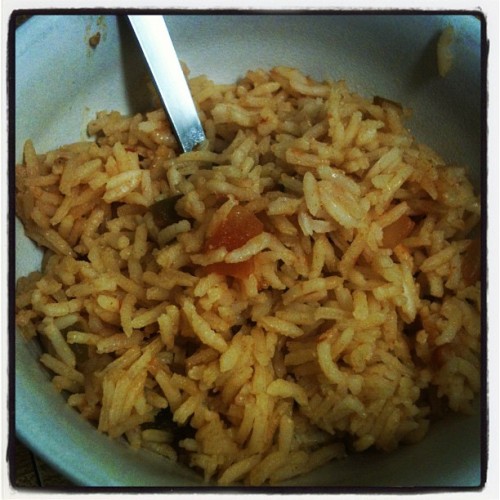
Super Sides: Mexican Rice

Forget Taco Tuesday. I am down for Mexican night any night of the week. Given my love of that South of the Border flavor, you are almost always guaranteed to find salsa in my fridge and taco seasoning in my spice cabinet. There is also always a healthy supply of Basmati rice, too. Put the three together and you get a Super Side: Mexican Rice. I found this recipe on Pinterest, originally from The Tidy Nest.

This recipe is incredibly easy and requires ingredients that, like me, you probably already have in your fridge or cabinets.

What you need:
1 cup uncooked rice
2 cups chicken broth (or water with bouillon added)
1 tablespoon butter or cooking oil
1/2 cup salsa
1 teaspoon powdered garlic
1 teaspoon taco seasoning


What you do:
Toast the dry rice in the pot on low heat for about 4 minutes before adding any ingredients - this opens the pores of the rice grains and allows it to become fluffy when cooked.

After you've toasted the rice, add all of the remaining ingredients. Bring to a boil for 1 minute, then turn heat to low, put a lid on the pot and let cook until all of the liquid is absorbed and the rice is fully cooked.

So easy, right? I used mild salsa and taco season and admittedly, the flavor of the rice was a little lacking. To give it a boost, I added a few splashes of Tapatío hot sauce. To me, this sauce has a lot of heat, so a splash or two goes a long way.


Monday, November 5, 2012

Miniature Pumpkin Pies

The weekend before Halloween, I hosted a pumpkin carving party at my apartment. With Hurricane Sandy blowing her way toward the Northeast, we opted to move the party indoors instead of enjoy the crisp fall air and colorful leaves outdoors. I have to admit I'm a little disappointed that Mother Nature created the most beautiful party decorations and we were unable to take advantage. Maybe next year. Inside though, with all of our guests, we were comfy and warm and filling our bellies with some of the best autumn foods before setting to work carving our pumpkins.

The menu included: turkey chili, corn bread (made by a guest), garlic hummus with veggies, chips and salsa, pumpkin chocolate chip cookies, spring rolls (made by a guest), caramel covered apple bites, home-brewed pumpkin beer and my favorite: miniature pumpkin pies with freshly whipped heavy cream.

When it comes to pumpkin pie or pumpkin roll, I always turn to Libby's for a guaranteed good recipe. The pumpkin pie recipe is posted online as follows:

3/4 cup granulated sugar
1 tsp ground cinnamon
1/2 tsp salt
1/2 tsp ground ginger
1/4 tsp ground cloves
2 large eggs
1 can (15 oz) pumpkin puree
1 can (12 oz) evaporated milk

The directions are incredibly simple, and Libby's rates the recipe level as "easy:"

In a small bow, mix sugar, cinnamon, salt, ginger and cloves. In a separate, large bowl, beat the eggs. Stir the pumpkin and the sugar-spice mixture into the large bowl. Slowly stir in the evaporated milk.

Easy? They weren't kidding.

All that's left to do is pour the pie filling mixture into the pie shell and bake. The recipe recommends a 9-inch unbaked pie shell with a 4-cup volume, but I was making an easy-to-eat dessert for a party with 9 adult guests and a 4-year-old. To accomplish that, I found Keebler's miniature graham cracker pie crusts. Not traditional for pumpkin pie, but everyone loved the graham cracker crust. I made a dozen miniature pies, and had extra pie filling left.

Baking instructions are to preheat the oven to 425 for 15 minutes, then reduce the heat to 350. Bake the pie for 40-50 minutes and cool on a wire rack for 2 hours.

Given that my party preparation time for making the food was a little tight, I skipped the preheat time and baked the pies at 400 until they were done. They came out juuuust fine. Also, instead of the individual measurements of separate spices, I added 2 tsp of pumpkin pie spice.

To make freshly whipped cream, I put a metal bowl and the beaters for an electric hand mixer in the freezer for about 15 minutes. I'm sure there's a kitchen-science reason for this, but I do it for the reason a lot of us probably do many things in the kitchen: "because that's how mom always did it." When the bowl and beaters are cold, pour heavy cream into the bowl and beat on high until it turns from liquid into a firm but fluffy consistency - whipped cream!  

I really loved having the mini pies as opposed to one large pie. They were the perfect serving size for one person, were in their own foil pie tins so no need for an extra plate, and they make sending leftovers home with guests easy as...pie!


Wednesday, October 3, 2012

The $7 Savior

Ever have those nights when you're just not interested in cooking dinner? Oh I know - me either. That's crazy talk.

Real talk now. We all have those nights. There are plenty of convenient foods available, but I've got to be honest. I feel ashamed of myself if I'm caught with a Wendy's bag. And pizza, well, that's not super friendly for the health conscious among us.

If you'd like your meal to maintain some semblance of being home-cooked, that's where the "$7 Savior" comes in. My neighborhood grocery store sells freshly made rotisserie chickens for just under $7 and they sure do the trick.

Of course you can eat the chicken with some homemade sides, like asparagus sauteed in olive oil and lemon juice, garlic bread, a small salad, etc., I like to get a bit creative with my rotisserie chicken meals.

Here are my top three:

1. Chicken Soup

This one is slightly more time intensive, but is absolutely worth it. Here is a detailed recipe for perhaps the easiest chicken soup you'll ever make (no, opening a can does not count). Basically, saute your garlic and onions, add water and Better than Bouillon, chop and add the rest of your veggies and your pulled apart rotisserie chicken (no bones). Heat until the veggies soften and there's dinner.

2. Chicken Nachos

This is a great appetizer to get when you go out to dinner with friends, but why wait for that occasion? Spread your tortilla chips on a baking sheet, pull apart some of the breast meat from the rotisserie chicken and stop the chips with shredded cheese. I like to keep my nachos simple - just chicken, cheese and salsa - but the toppings options are numerous. I add the salsa to my nachos after they come out of the oven.

3. Salad

Salads are great, but not always filling. When I buy a rotisserie chicken, I almost always get about 4 meals out of one chicken, and a couple of them are usually salads. It's a great, easy, quick option for me to prepare for lunch at work. Just pull apart some of the rotisserie chicken and add it to your greens and whatever other veggies make your salad complete, then pack your salad dressing, croutons, etc. separately.

So the next time you're looking for a time saver in the kitchen, don't think twice about calling on the $7 Savior. You'll could be eating easy, inexpensive and healthy meals in no time!