Tuesday, October 1, 2013

super sides: crock pot apple sauce

After coming home with nearly 18 pounds of apples from a local orchard last Sunday, I certainly had some work to do. I'm hoping to have plenty of apples for pies in the coming months (we were told at the orchard that if you put the apples in a plastic bag in the coldest part of your fridge, they will last 6-9 months...amazing!), but I also wanted to try making apple sauce for the first time.

I found a couple of recipes online, and decided to go with the crock pot version. Making apple sauce in the crock pot is perfect because you can prepare the apples in the evening, then let them cook all night. When you wake up, you have warm apple sauce ready for breakfast. Plan about a half an hour for prep time and 3 hours cooking time if setting your crock pot temperature to high, or overnight for a lower temperature setting. I made quite a few adaptations to the original recipe, which are all noted in the description below.

what you need:
3-4 lbs apples (peeled, sliced and cored)
1 tsp lemon juice
1 tsp cinnamon (or other spices - nutmeg, ginger, cloves, allspice, etc.)
1/2 cup brown sugar
1 cup water
crock pot
hand potato masher (or food processor or blender)
kitchen scale (not necessary, but helpful)

what you do:
1. Rinse, peel, slice and core your apples. I do all of this by hand rather than use and apple coring device.
2. Measure the quantity of apples either by weight or volume. If using a kitchen scale, don't forget to tare the scale with the empty container on it before adding the apple slices. If your scale does not have a tare feature, weigh the empty container first, then subtract its weight from the total weight of the container and apple slices. If measuring by volume, 3 pounds of apples was around 16 cups. The original recipe calls for 4 lbs of apples, but my crock pot got pretty full around 3 lbs.
3. Dump all of the apple slices into the crock pot. Then add the sugar, cinnamon (or other spices), lemon juice and water, stirring all of the ingredients together in the crock pot. I added measurements in the ingredient list as a starting point, but I eyeballed the amount of lemon juice and cinnamon. You can omit the sugar from this recipe completely, adjust the amount, or perhaps try another sweetener like honey or maple syrup. Also, the 1 cup of water is for 4 lbs of apples, but it did not make my apple sauce too thin, even with only 3 lbs of apples.
4. Cover your crock pot and set the temperature. The original recipe calls for 3 hours on high or 6 hours on low. I cooked my apples on high for about 2 hours (stirring the apples a few times), and when I went to bed, I changed the temperature to the "keep warm" setting to continue cooking overnight.
5. After the apples have cooked, turn your crock pot off and use the hand potato masher to mash the apples right in the crock pot. They should be soft enough to mash into a nice consistency sauce with some small chunks. If using a blender or food processor, ladle apple slices (they are still whole) and liquid from the bottom of the crock pot into the blender or food processor in small batches. Use a pulse setting until the apples are just blended. Make sure all of the liquid is used - that's where all the flavor is!  
If you've made a larger batch than you can eat fresh, apple sauce can be canned using the water bath method, and can also be frozen in air-tight containers or freezer/food storage bags.


I'm usually in such a rush in the mornings that I never make time for breakfast. In fact, the same container of oats is still unopened on my counter from when I bought it about 3 weeks ago and haven't had time to make stove top oatmeal for breakfast. It was so nice to wake up to a pot of warm apple sauce and get to enjoy it first thing in the morning.

sunday funday: apple season

We had amazing weather on Sunday, and local apples were ripe for picking, which meant an afternoon spent at the apple orchard - after we stuffed ourselves silly on some amazing wings (priorities, you know). Ashley and I headed to an orchard in one of the city's northern neighboring counties, and it looked like everyone else had the same idea. We got to the orchard and waited in a line of cars until we were directed to a place to park. There were lines of people everywhere - a line to get into the market, a line of people waiting to hop on the wagon for a ride to the orchard and a line of people with full bags of apples waiting to pay. Not one to waste time standing in lines and not wanting to waste such a nice afternoon, I almost suggested we ditch the idea and find something else to do. I'm glad we stuck to our plans, because it ended up being a great afternoon.

I was really hoping to load up on honeycrisp apples, but the biggest part of the orchard open for picking that afternoon was full of piñata apples. We were told they're a newer variety, really sweet and great for baking or eating. We had fun climbing the ladders to get the apples from the tops of the trees and filled our bags up pretty quickly. Ashley ended up with 11.5 pounds of apples and I think I left with somewhere around 18 pounds. He's looking forward to brewing another apple beer, and of course I want mine for baking (first, apple sauce!). And we may or may not have snuck around to one of the unopened rows and picked a few contraband apples.

As we were walking back to the car and stuffing our faces with fresh apple cider donuts (is there anything better than a warm apple cider donut sprinkled with sugar?), we saw two hot air balloons on the horizon. Well, what else are you going to do on a late Sunday afternoon other than chase them down? Off we went! We wound our way through back roads and neighborhoods until we spotted the chase vans and were close to the balloons. It was so cool! You could see the flames at the base of the balloon and make out the shape of a few people in the basket. They must have had an amazing view from all the way up there!

If I keep up the baking frenzy, maybe we'll make it back to the orchard another time or two before the season's over.

Friday, September 27, 2013

crafty home style: an autumn wreath

Autumn's officially here! Since I was a kid, it's been a favorite time of year for me. I loved school (nerd alert). I loved raking leaves in the yard - then jumping in them or running through them with the dogs. We won't mention that time my friend and I drove through the neighborhood late one night, blowing through everyone's leaf piles on the edge of the road. Ooops. My mom's birthday is on Halloween, so that was always a big event, too. There was dinner and birthday dessert at the grandparents' house, then all the cousins getting ready together for trick-or-treating. We'd rake in all the candy we could after making rounds through two neighborhoods...and my loot sat in my trick-or-treat bag all year on my closet floor while I was still developing my sweet tooth (my, how times have changed). Closing out the season, Thanksgiving was always a rowdy event - up in the morning to watch the Macy's Thanksgiving Day Parade while the day of cooking began. Again, the whole extended brood usually gathered at the grandparents' house where we would sometimes overflow into two dining rooms while we feasted. So you see, it's more than just being about the debut of the pumpkin spice latte, and I'm always excited to welcome the season.

I can't wait until the day when I have my own front porch to decorate with corn stalks and jack-o-lanterns, but for now a few decorations here there will have to work for apartment living. A holiday wreath is perfect for that. 

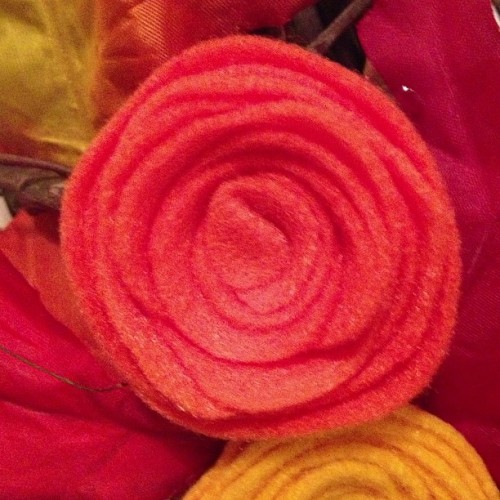
I found a tutorial for making felt flowers, and wanted to use that idea for a fall wreath. With a $5 grapevine wreath, a spool of ribbon, a few small sheets of felt, silk autumn leaves, straight pins, glue sticks and a hot glue gun, you'll have everything you need for your wreath. 

To make the flowers: Place a circular object like a CD on the sheet of felt. The small sheets in the craft section are big enough for three CD-sized circles. Trace the circular object with permanent marker. First, cut the full circle out of the felt. Then, begin cutting the full circle into a spiral toward the center. If you cut a wavy-line spiral instead of a cutting a smooth edge, when you roll the felt up, your flower edge will look like real petals. Once you've cut the spiral, pinch the inside end of the spiral-cut felt, and begin wrapping the strand counter-clockwise around the outside of the pinched end. Poke a straight pin through the flower from the outside edge to the middle, and you're finished! Super easy. You can also use hot glue to glue down the outside end of the felt strand after wrapping it.  

Make as many flowers as you want in as many colors. I chose a deep red, orange and yellow. The craft store had lots of pretty shades (you know, to avoid looking like you're making a decoration for the front door of your neighborhood McDonald's). Once your flowers are all made and secured, set them aside.

I bought a strand of leaves from the craft store, and cut off individual leaves that I wanted to use for the wreath. I played around with the different sizes, shades and overlap of the leaves. Once I figured out an arrangement I liked, I just wove them, stem first, into the vines of the wreath without any further securing. My wreath will be hanging indoors, but for an outdoor wreath you may want to use hot glue to secure the leaves to the wreath. 

After your leaves are placed and secured, it's time to add the felt flowers. If you finished your flowers with a straight pin, be sure to arrange them so that the head of the pin is not showing. The backside of the flowers should be mostly flat, making it pretty easy to add hot glue and attach them to the wreath. A spiral of glue on the back of the flower and pressing and holding it in place for a few seconds should make it secure. Allow the wreath to remain on a flat surface for a few minutes while the glue dries to be sure everything stays tightly in place.  

With your spool of ribbon, you can make a loop to hang your wreath - measure twice, cut once! Use a solid colored wide ribbon, or get creative by mixing different colored or patterned thinner ribbons and twine.  


Monday, September 2, 2013

awesome appetizers: baked pulled pork wontons

Every so often at my house, we love to pig out on homemade pulled pork. I make it in the crock pot with beer. Dark, delicious, flavorful beer. And a few other ingredients. It's great as leftovers for lunch or dinner (I think the flavor gets better a day or two later) and it freezes well. But the last time we made pulled pork, Ash had an idea to try something new with the leftovers: pulled pork wontons.

The wontons were super easy and quick to make.

what you need:
leftover pulled pork
wonton wrappers
BBQ sauce (if desired - for recipe and for dipping)
small dish of water (a shot glass size is plenty)

what you do:
1. Lay your wonton wrappers flat on a baking sheet.
2. Put a small amount of pulled pork in the center of each wrapper (shred a little finer if needed).
3. If you like, add about 1/2 tsp BBQ sauce on top of the pulled pork (another option is to mix the pulled pork with BBQ sauce before making the wontons)
4. Dip your finger in the water, and lightly wet each corner of the wonton wrapper, then fold all corners up and pinch closed.
5. Space the folded wontons on the ungreased baking sheet about an inch apart.
6. Bake at 275º for about 15 minutes, or until the edges of the folded wonton wrappers become golden brown.

These were a great snack! The pulled pork had really absorbed the flavor of the beer and seasonings, so the wantons certainly held their own in the flavor department with or without the BBQ sauce.


Thursday, August 1, 2013

Sunday Funday...a day early

A couple Saturdays ago, Ash and I made the three-hour drive from Philly to the Hudson Valley area of New York for a family reunion - where relatives of my great grandmother's family (she lived from 1911-2003) gathered to share stories, reminisce, or in my case, meet each other for the very first time. Our family has deep roots in that area of New York - the original farm house still stands amid rolling hills on Cottekill Road just west of the Hudson.

I've visited the area many times, one being several years ago to interview for a job and scope out potential places to live. Truth be told, my heart was set on settling there over Philadelphia. There's something about places you belong, whether you consciously know you belong in them or not, taking you in and making you aware of something you haven't known before. My moment happened on a late night drive down a dark, wooded road during the summer of 2007. I was on my way to an old mansion on the grounds of Bard College, where I would stay the night before my interview. The song I listened to over and over around the time my great grandmother passed had, almost by some play of the universe, come on. It was blasting through my speakers, and as I made my way down this road I'd never driven before, I suddenly felt at home.

As things go, I didn't end up moving to Kingston or Rhinebeck or any of those other beautiful little towns on the Hudson, but I relish every moment I get to spend there because to me, it still feels like home.

After the reunion, we drove across the river to Poets' Walk Park (free!). A couple of years ago I read about the park and have wanted to visit ever since. It's a place that's rumored to have inspired Washington Irving's Rip Van Winkle and to have been a haunt of many other well known authors. Naturally built structures across the landscape invoke feelings of the Transcendentalists, and taking in the majestic views, it's almost impossible to deny nature of the glory she deserves.


We hiked through meadows, through woods, over creeks and to look-outs above the mighty Hudson River. We saw the remnants of the 17 year locust brood emergence. I saw my first bald eagle ever in the wild and coolest of all, it had a fish in its talons and was flying back to the treetops from the river. So cool! And then we saw another, sans fish.      

It was a pretty great day. The bugs were crazy in the woods, but the meadows were gorgeous and the views couldn't be beat. I can't wait to go back for a visit again soon.

Photo by Ash at Poets' Walk Park


Friday, June 28, 2013

Sunday Best

It's no secret that brunch is one of my favorite weekend activities. A lazy morning, lots of food, good coffee...what's not to love?

A friend and I were talking recently and the topic of French toast came up. French toast? Ohhh, French toast...that long forgotten breakfast food that I feel I haven't made in years. And that's when I knew exactly what would be on my table come Sunday morning.

Here's a funny story about French toast: when I was growing up, it always kind of grossed me out. Soggy, eggy bread? Gross. Then my mom started making baked French toast, and let me tell you, that stuff will rock your world. Same prep is involved, just a different cooking method. There's also some flexibility with ingredients, allowing for a tiny bit healthier recipe (such as eggs vs. egg whites or milk vs. half and half/cream). As with many of my recipes, measurements here are eyeballed. Determine the amount of bread you're using first, then measure out the eggs and milk to give yourself enough liquid to dip each side of all the bread slices.

What you need:

Bread of choice (I used fresh Ciabatta from my Saturday Trader Joe's trip)
Eggs (or egg whites)
Milk, half and half or cream
Melted butter (optional - about 1 or 2 tbs)
Spices (I like cinnamon, nutmeg and ginger)

What you do:
-Slice your bread into about 1" thick pieces (I used 5 slices)
-Crack your eggs (or pour eggs whites from a carton) into a dish large enough to dip your bread slices
-Pour in your milk, half and half or cream (this should be maybe 1/3 the amount of egg/egg whites)
-Pour in your melted butter (if using - let cool so it doesn't harden when you pour it into the cold egg/milk mixture)
-Add your spices, then whisk all of the ingredients together
-Prepare a baking dish by greasing it with butter or cooking spray
-Dip each side of each piece of bread into the mixture so that it is saturated, then place it in the baking dish
-Bake uncovered at 350º for about 30 minutes (longer if you want your French toast crispier and less soggy), turning the pieces of bread over once during baking.

Top off your warm, baked French toast with fresh berries, banana slices, syrup, butter, or a dusting a powdered sugar. Or even more fun, if having brunch with family or friends, make a French toast bar laying out all the possible toppings and let your guests create their own perfect French toast. Enjoy!

Saturday, June 22, 2013

delicious desserts: busy day chocolate cake with strawberries and cream

I have to admit something. This is the first time ever that I've made a busy day chocolate cake. In fact, it wasn't until I began Pinteresting (it's a verb now...just go with it) my little heart out that I first even heard of busy day chocolate cake when I stumbled upon this adaptation of the Martha Stewart recipe. Let me take a moment here to go off on a little tangent. I love Pinterest. I love the inspirational spark of motivation Pinterest can light. But man, all I ever want to do is bake deliciously terrible-for-your-jeans desserts. Sigh. But anyway, I had a good reason this time, because it was Ashley's birthday!

To make this cake into a real birthday treat, I decided to double the fun and make a two layer cake. I'm usually pretty terrible at two layer cakes. Why? Because I'm too impatient. Sigh again. No matter how long I wait to add frosting and stack the top layer of cake upon the bottom, it never seems like it was enough time. The frosting gets soft from the heat of the cakes and just melts away. It's really quite a tragedy. So this time I smartened up and made this a two-day process. Night 1: bake the cakes. They can cool overnight and into the next day. Night 2: zip home from work, whip up the frosting, slice up the strawberries and assemble the layers. The finished masterpiece: a two layer chocolate cake with cream cheese/Cool Whip frosting and fresh strawberries.

This cake is super simple to make, so here's how you do it:

what you need (makes 1 cake):

1-1/2 cups flour
1 cup sugar
1/4 cup unsweetened cocoa powder
1 tsp baking soda
1/2 tsp coarse salt
6 tbsp vegetable oil
1 tsp vanilla extract
1 tbsp distilled white vinegar
1 cup cold water

what you do:
1. In a large bowl, whisk together the flour, sugar, cocoa powder, baking soda and coarse salt.
2. Make a well in the center of the dry ingredient mixture. Add the vegetable oil, vanilla, vinegar and water.
3. Stir together until all ingredients are well mixed and there are not any lumps in the batter (the consistency is much like brownie mix).
4. Pour into a round cake pan (mine is non-stick so I did not grease it) and bake at 350 for 35-40 minutes. Poke the center of the cake with a toothpick to be sure it's baked all the way through.
5. Remove cake from the oven and cool it in the pan on a wire rack. Once cooled, tip the pan upside down on a serving dish to gently remove the cake. Frost when completely cooled.

Apparently the idea of the "busy day cake" is that you can mix all of the ingredients right in the cake pan. I tried it, and then I poured the dry ingredient mixture into a large mixing bowl which I used to continue adding and mixing the ingredients. There was no was I was going to mix all of the ingredients in my cake pan without half of the batter ending up on the counter. On the plus side: since this recipe doesn't include eggs, if you use a mixing bowl, you get to lick it clean. Kidding, kidding (yeah...not kidding at all).

This frosting is also a quick and delicious option:

what you need:
8 oz package of cream cheese, softened
16 oz container of Cool Whip (let thaw slightly)
1/2 cup (or less) powdered sugar
1/2 tsp vanilla extract

what you do:
1. Combine all 4 ingredients and whip together with an electric mixer until you have a fluffy frosting.
2. Apply to cooled cake or cupcakes (you can use this frosting in a pastry bag or frost your baked treats with a knife).


To make the completed double-decker cake, I made two separate recipes of the cake batter instead of doubling the recipe. Made one, poured it in the cake pan, then made the second and poured it in another cake pan (and then "cleaned" the bowl). The day after baking the cakes, I turned one cake upside down onto a serving dish. I applied a layer of room temperature frosting (easier to work with), spread it over the cake with the back of a large spoon, and on top of it, a layer of strawberry slices. Next I added the second cake, upside down, on top of the strawberries (enough frosting squeezes through between the strawberry slices to keep the cakes together), another layer of frosting, and a final layer of strawberry slices. I decided a little design of the "edge" pieces of strawberries was prettier than completely covering the top of the cake with slices. The sides of the cake are not frosted, but you could frost them if you choose.

The cake was so good - the cream cheese, the chocolate, the strawberries - perhaps one of the best birthday cakes yet!